Gino Romanelli BS Ex Sci, FMS2, FCS, ISSA Elite Trainer
Introduction:
There is an overwhelming variety of squats and information on how to execute them. This post will explain the myths about squats and how to squat correctly based on your anatomy.
Squat Myths:
As I stated above, there are a ton of myths about the squat. What squat variation works best for you will depend on your overall mobility and stability, training experience, and training goals (hypertrophy or strength). First, everyone has been told to only squat to parallel because you will damage your knees and lower back. Second, do not let your knees travel over your toes because you will pop your quad tendon right off and stress the ligaments of your knee. Third, make sure you only squat with your feet shoulder width and toes pointing straight ahead. Lastly, arch your back and look up at the ceiling. Now the first major glaring issue with these statements is that everyone should squat the exact same way. No matter the situation, this is terrible advice. Everyone is made up a little different. This means your anatomy is different from the next person.
First, let’s look at your hips as an example. This comes down to two things: anterverted and retroverted hip angles. An anterverted hip angle is the thigh bone being rotated excessively inward. This means this person can squat better with a narrower stance and a more straightforward toe position. A retroverted hip angle is a thigh bone rotated excessively backward relative to the knee. This means that the person will need to assume a wider stance and more of a toe-out position. No amount of mobility work will change the structure of your anatomy.
Another thing to consider is the length of the individual’s femur. People with longer femurs will have a more forward torso position, while people with shorter femurs will maintain a more upright torso as they squat. The goal is to keep your shoulder or the barbell over the foot’s midline to maintain balance in this exercise.
Second, the fear-mongering of deep squats on knee health started back in the 1950s-60s. Dr. Karl Klein was responsible for this. His theory was that deep squats were the leading cause of the increase in knee injuries in American football players. Therefore he promoted squatting to only parallel out of fear that deep squats stretch the ligaments in your knees. But in fact, the ACL and PCL are exposed to the most tension when squatting to or above parallel. But the lower you squat, the less force the ligaments are exposed to!
Lastly, squatting with an arched back under load is dangerous to your lower back. Also, if we do the opposite and go into excessive flexion, this is not ideal. We need to find that middle ground which is commonly referred to as a neutral spine. The way that we maintain a neutral spine during a squat is by bracing your core correctly. Your core muscles surround your spine and when they are recruited properly, they will lock your spine into a neutral position. To brace properly, you first need to tuck your hips under your ribcage so that they are level. After that, take a big deep breath into your stomach (not your chest), lock that breath down, and brace like you’re going to get punched in the stomach. The goal is to maintain this brace and positioning throughout the entirety of the rep. This will allow you to be stable and have proper mechanics during your squats. Just remember, a long core is a weak core.
Proper Squat Mechanics:
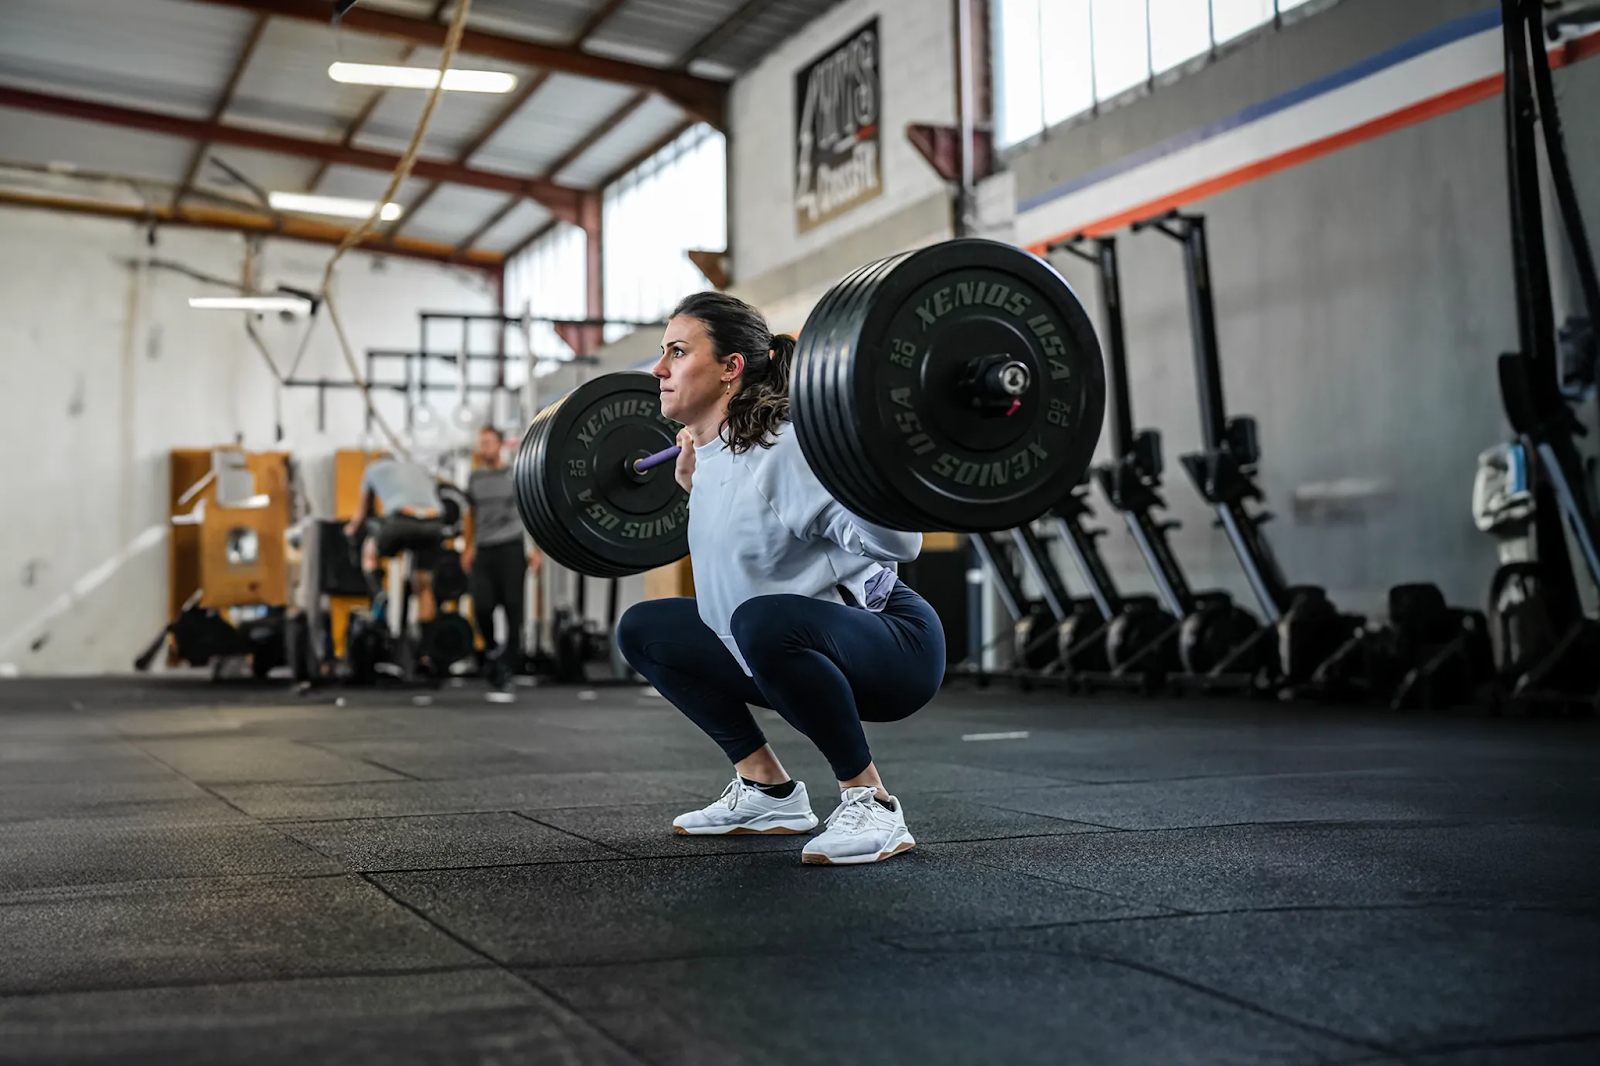
When figuring out the proper squat mechanics for an individual we need to take into account their hip anatomy (discussed above), femur length, mobility and stability limitations, and their training goals. But, there are a few key things that everyone needs to have. This comes down to maintaining a tripod foot, braced core, and keeping your shoulder or barbell over your center of mass (mid-foot). Let’s take a look at all of this in action and go over the different phases of the exercise.
- Start position: The start position for every exercise you do is everything. If this is off, all the reps following will be out of whack. The first thing to do is get your foot in a tripod position. The way to do this is to think about grabbing the floor with your feet and rotating your foot externally lightly. This will distribute your weight evenly across the three points discussed above. Next is to brace your core. Remember, get your hips level, breathe into your stomach, and lock that breath down. This will get your spine into a safe strong position.
- Eccentric: When starting the eccentric, you want to start by pushing your hips back slightly. Then descend into a deep squat or only going as low as your mobility will allow you to go. Everyone should be able to get at least their hip joint below the knee joint (breaking parallel) unless their mobility won’t let them or there are some major joint issues. You must also maintain a stable foot and braced core on the descent. This will assist you in keeping your knees in line with your second and third toe (avoiding knee valgus) and your shoulder or the barbell over the midline of your foot.
- Concentric: Lastly, on the concentric, you want to think about raising your chest and hips at the same rate. If your hips win this race, you will dump forward and turn the squat into a good morning, and if your chest wins, you will arch your back losing your braced core. A small degree of knee valgus is normal on the ascent as long as you don’t lose your tripod foot. This is known as the adductor twitch. While your goal should be to avoid knee valgus as much as possible, a small amount isn’t bad.
Conclusion:
Stay tuned for part two of this post to learn what squat variation is best for you based on your goals. We will analyze how the mechanics are different for a front-loaded squat, high bar squat, and low bar squat.